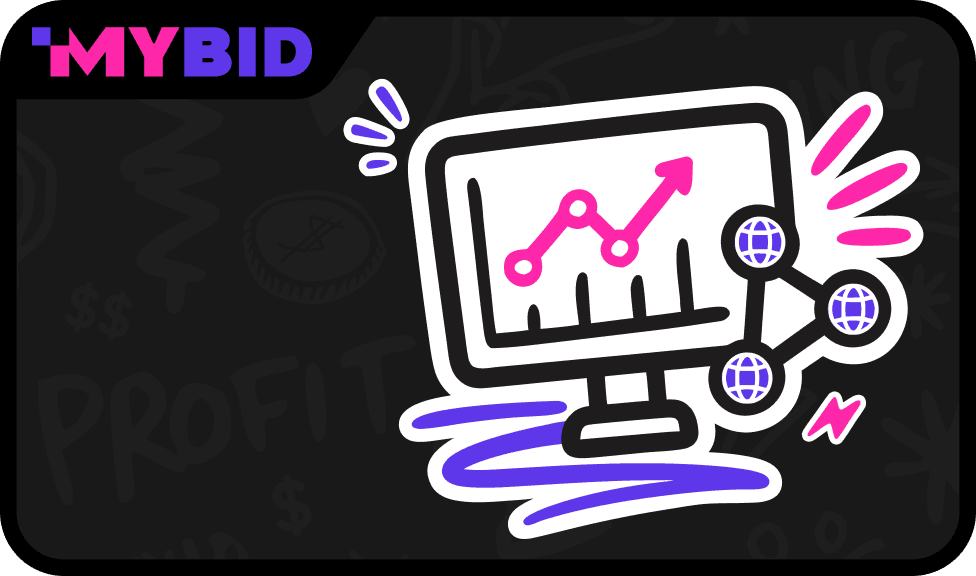
CPV Lab is an advanced ad tracker and attribution platform. It is often chosen by affiliates, agencies, and ecommerce businesses who need a reliable ad tracker online to consolidate all their campaigns in one place. As a self‑hosted solution, CPV Lab gives you full control over your data and offers the flexibility to manage unlimited campaigns, events, and offers.
With CPV Lab you can:
1. Track ad performance across multiple channels and attribute conversions correctly.
2. Run split tests for landing pages and offers, answering the question how do I track the performance of ad creatives in a measurable way.
3. Use Conversion API integrations to send conversions back to traffic sources, which is essential for how to track Facebook ad performance or how to track ROI from social media ad campaigns.
4. Monitor video and mobile funnels, making it easy to learn how to track YouTube ad campaign success.
5. Access detailed reports that highlight the benefits of conversion tracking, including ROI, CTR, and engagement metrics.
6. Apply keyword conversion tracking to identify which search terms generate the most valuable actions.
In short, CPV Lab is not just about conversion tracking. It is a complete ad spend tracker that helps you optimize campaigns, reduce wasted spend, and scale profitable strategies. For anyone asking what tools can help me track ad performance?, CPV Lab is a proven answer.
Step #1: Generate the Goal ID for the Postback URL
In your MyBid advertiser dashboard, open the “Goals” section. Here you can create the conversion tracking code that will be used inside your postback URL. Click on the “+ Create conversion goal” button.
The setup form for a new goal includes the following fields:
1. Assign a clear, descriptive name that indicates the purpose of the goal
2. Select the Conversion type
3. Select the Value type (this defines the payout for the conversion and is used to calculate Revenue and ROI for campaigns using this goal). Options include:
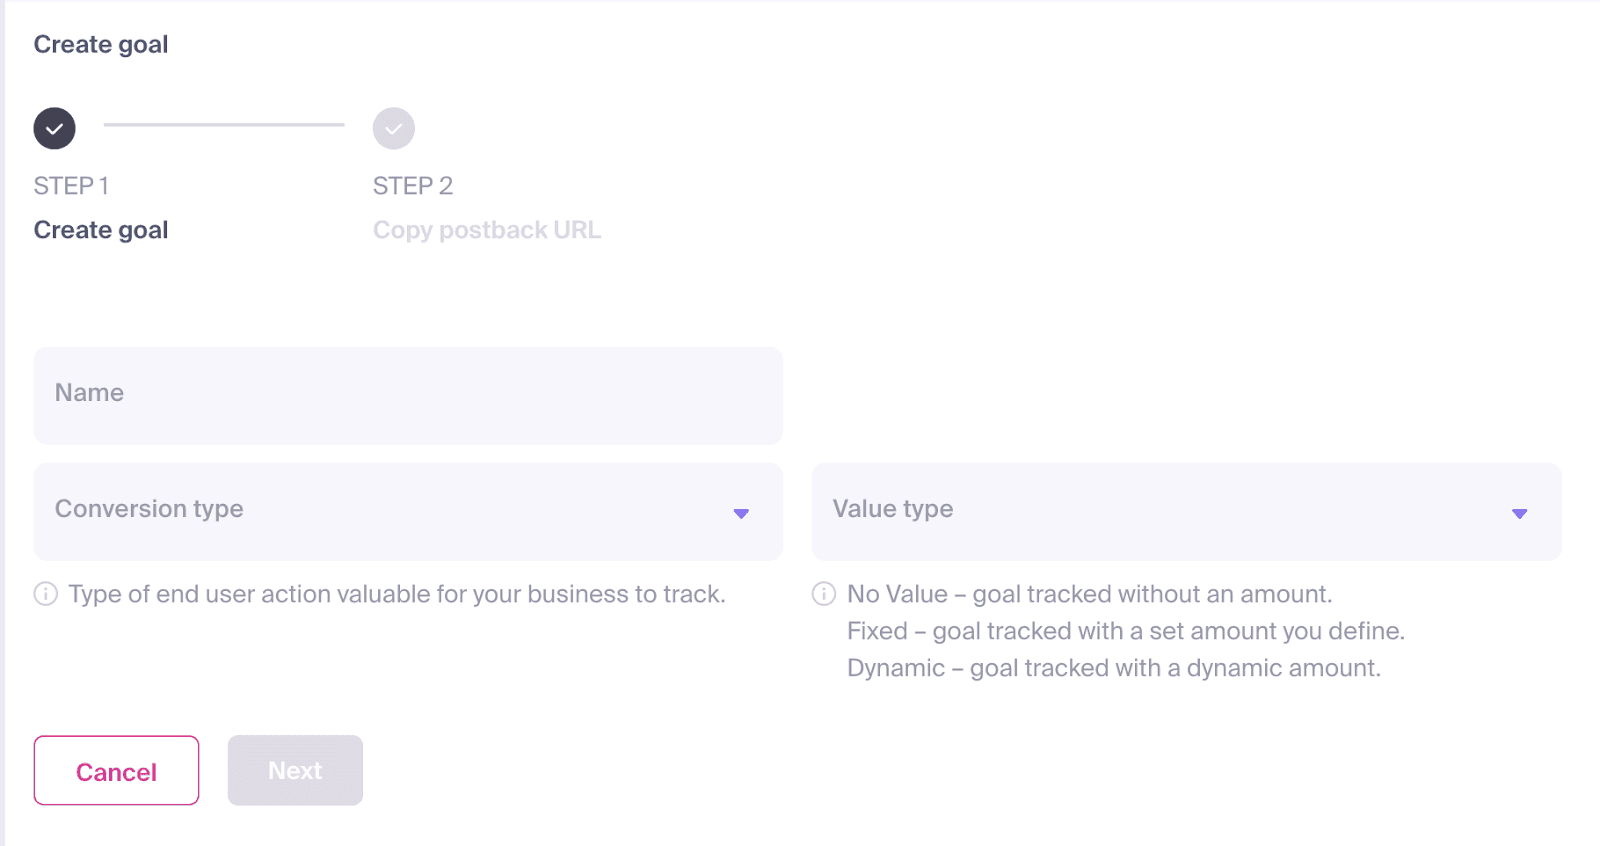
3.1. No Value – no monetary value will be logged with the goal
3.2. Fixed – a specific amount you define will always be logged with the goal
3.3. Dynamic – the value will be passed dynamically when the goal is logged
After choosing all the required settings, click Next. You will then see the postback URL that will be used to send conversion data. Click “Copy & done” to save the goal and copy the postback URL.
Each Conversion Goal you create has a unique identifier (goal_id) that links user actions to the correct goal.
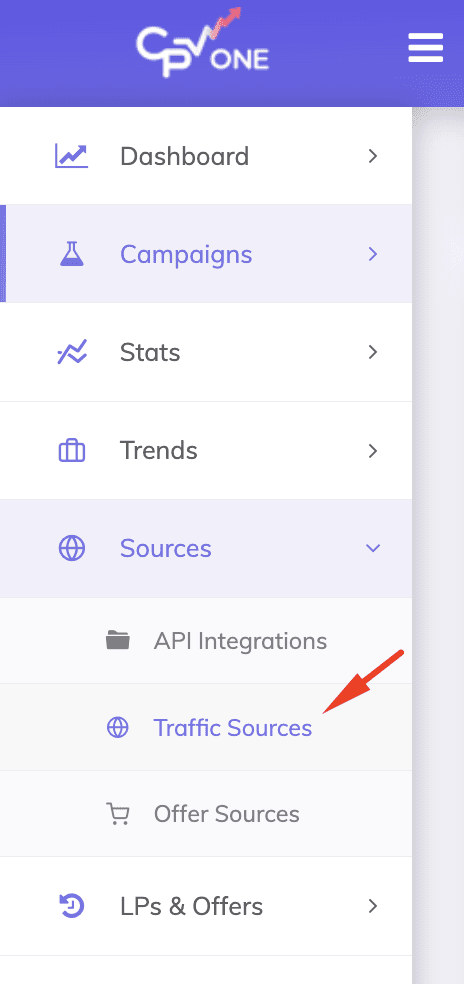
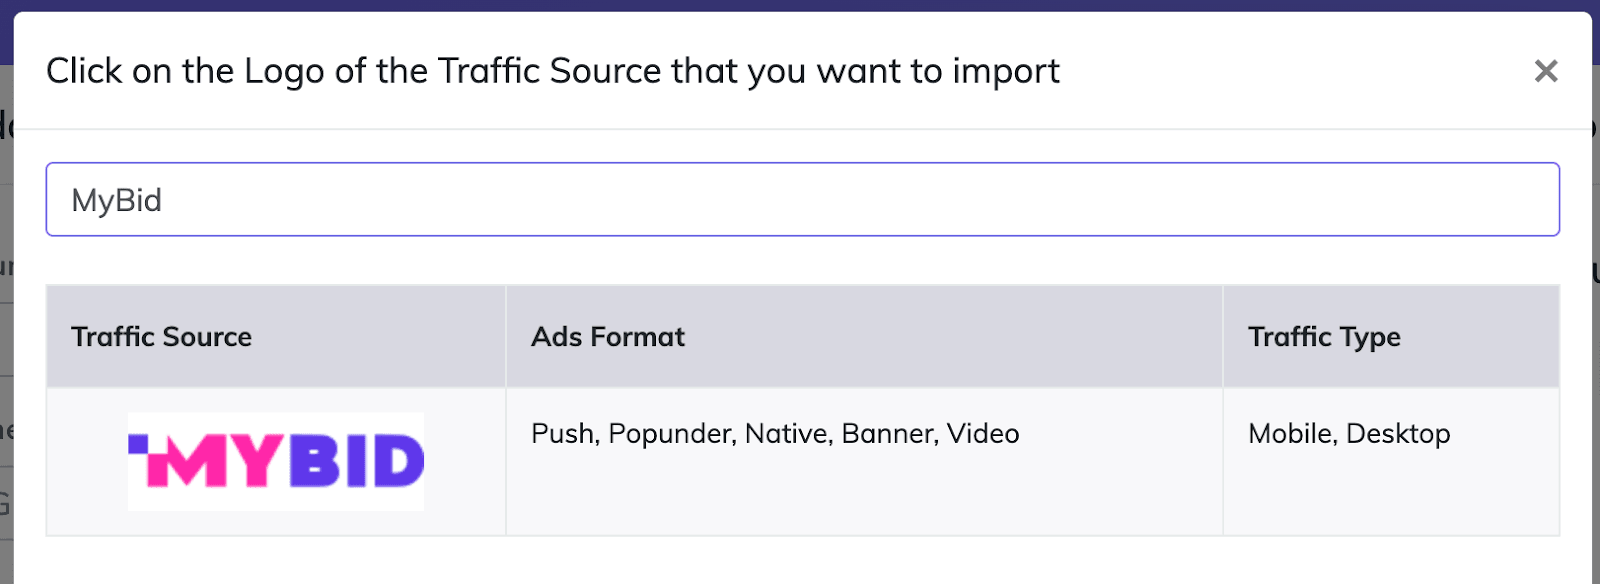
Step #2: Add MyBid as a Traffic Source in CPV Lab
Log in to your CPV Lab account. Go to “Sources” and select the “Traffic Sources” tab from the dropdown.
Click “Import from Catalog”
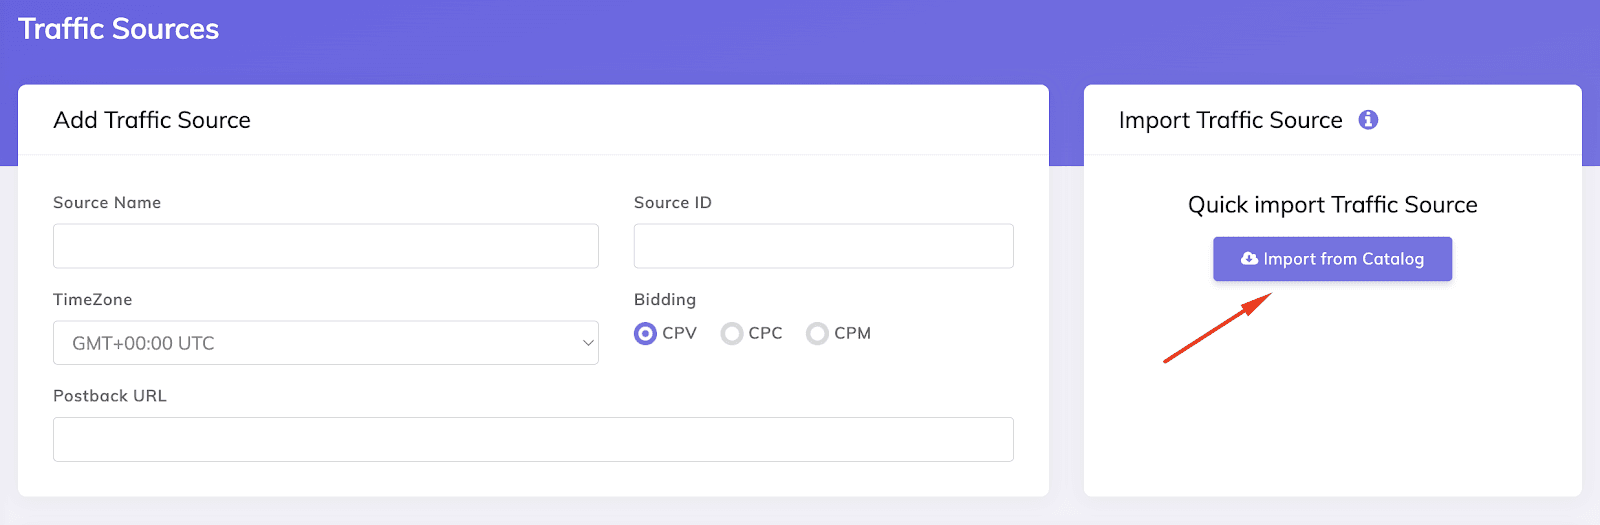
In the search bar, type “MyBid” and select the MyBid logo
CPV Lab will automatically fill in the required traffic source settings. In the Postback URL field, replace the placeholder “REPLACE” with the Goal ID you created in Step 1.
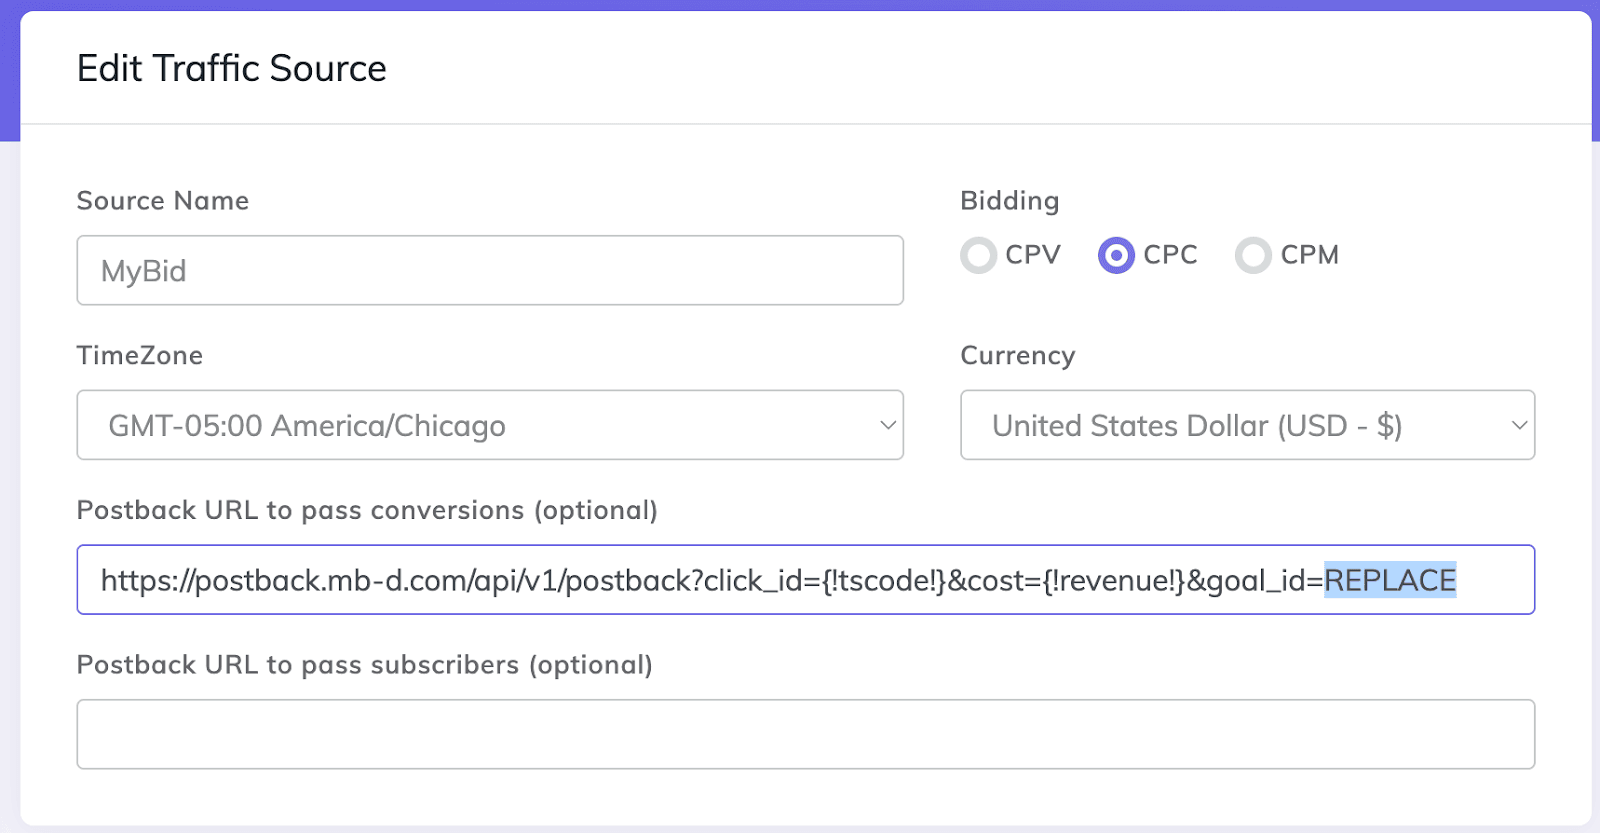
Your postback URL should look like this:
Code
https://postback.mb-d.com/api/v1/postback?click_id={externalid}&cost={payout}&goal_id=9999
Where 9999 is your Goal ID.
Note: If you chose a Fixed value for your Goal in MyBid, replace {payout} with your fixed amount. Example:
Code
https://postback.mb-d.com/api/v1/postback?click_id={externalid}&cost=111&goal_id=9999
Here, 111 is the fixed payout.
Click “Save” to store your MyBid traffic source settings in CPV Lab.
Step #3: Create the Postback URL in CPV Lab
To receive conversion notifications from an affiliate network, you need to generate a Postback URL in CPV Lab and add it to the affiliate network’s panel.
Refer to the CPV Lab documentation for details on adding affiliate networks, offers, and generating postback URLs
Or contact the CPV Lab support team for assistance
The Postback URL becomes available once you select the required Offer Source from the list.
After generating your CPV Lab Postback URL, paste it into your affiliate network panel so conversions can be passed back to CPV Lab.
If you encounter issues, reach out to your affiliate network’s support team.
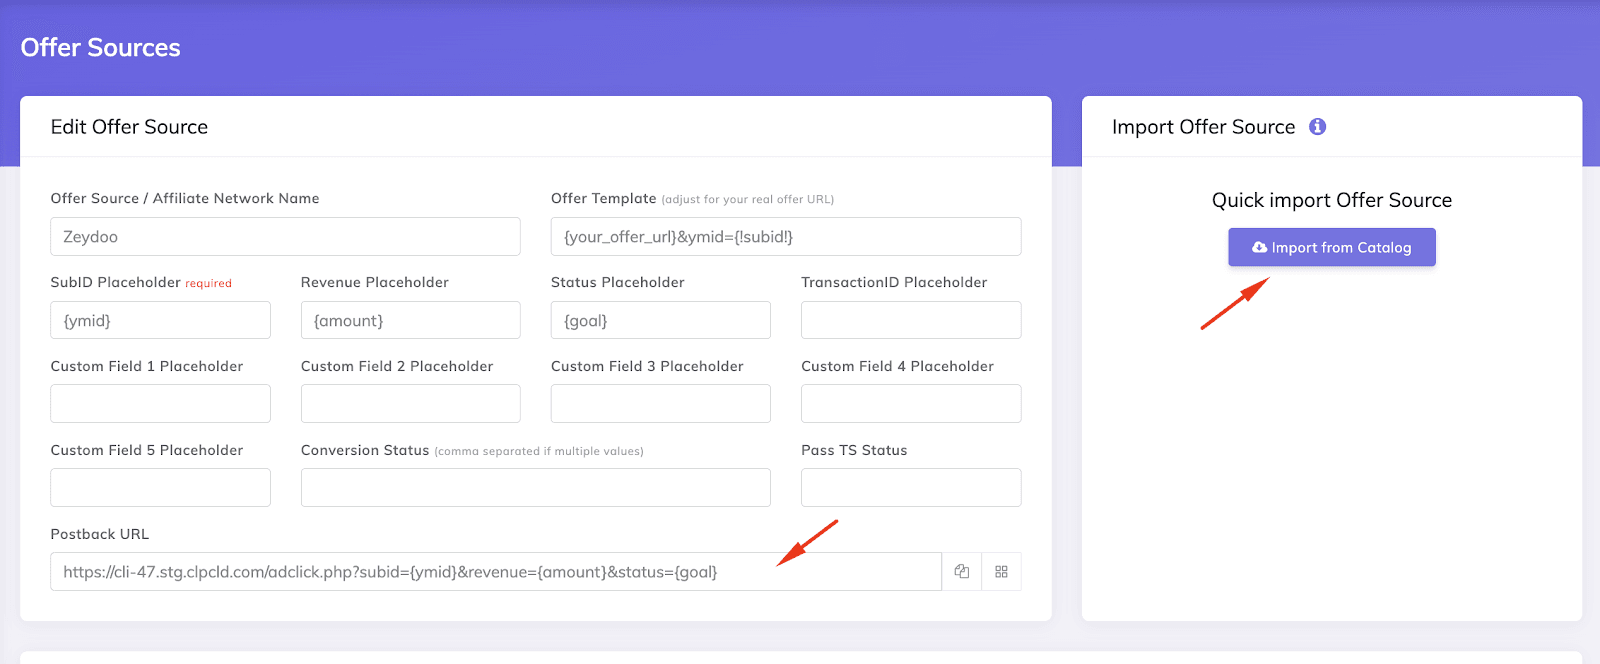
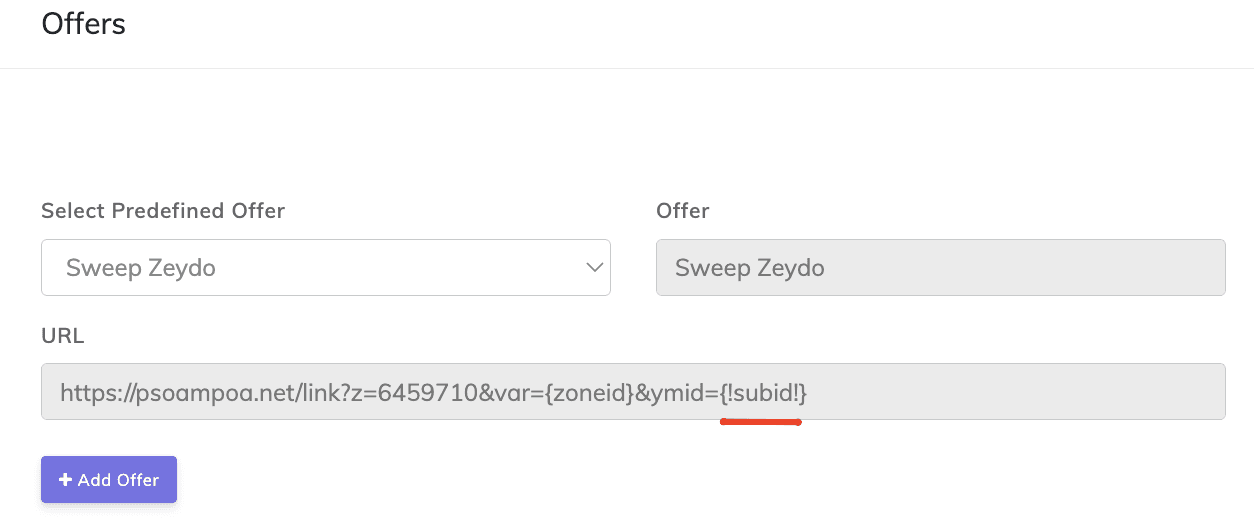
Adding an Offer in CPV Lab: When adding an offer, make sure to replace the {!subid!} placeholder with a unique token (clickID). This ensures each visitor is tracked and conversions are properly reported back to CPV Lab.
1. Go to the “Campaigns” tab
2. Select “Quick Campaign Setup”
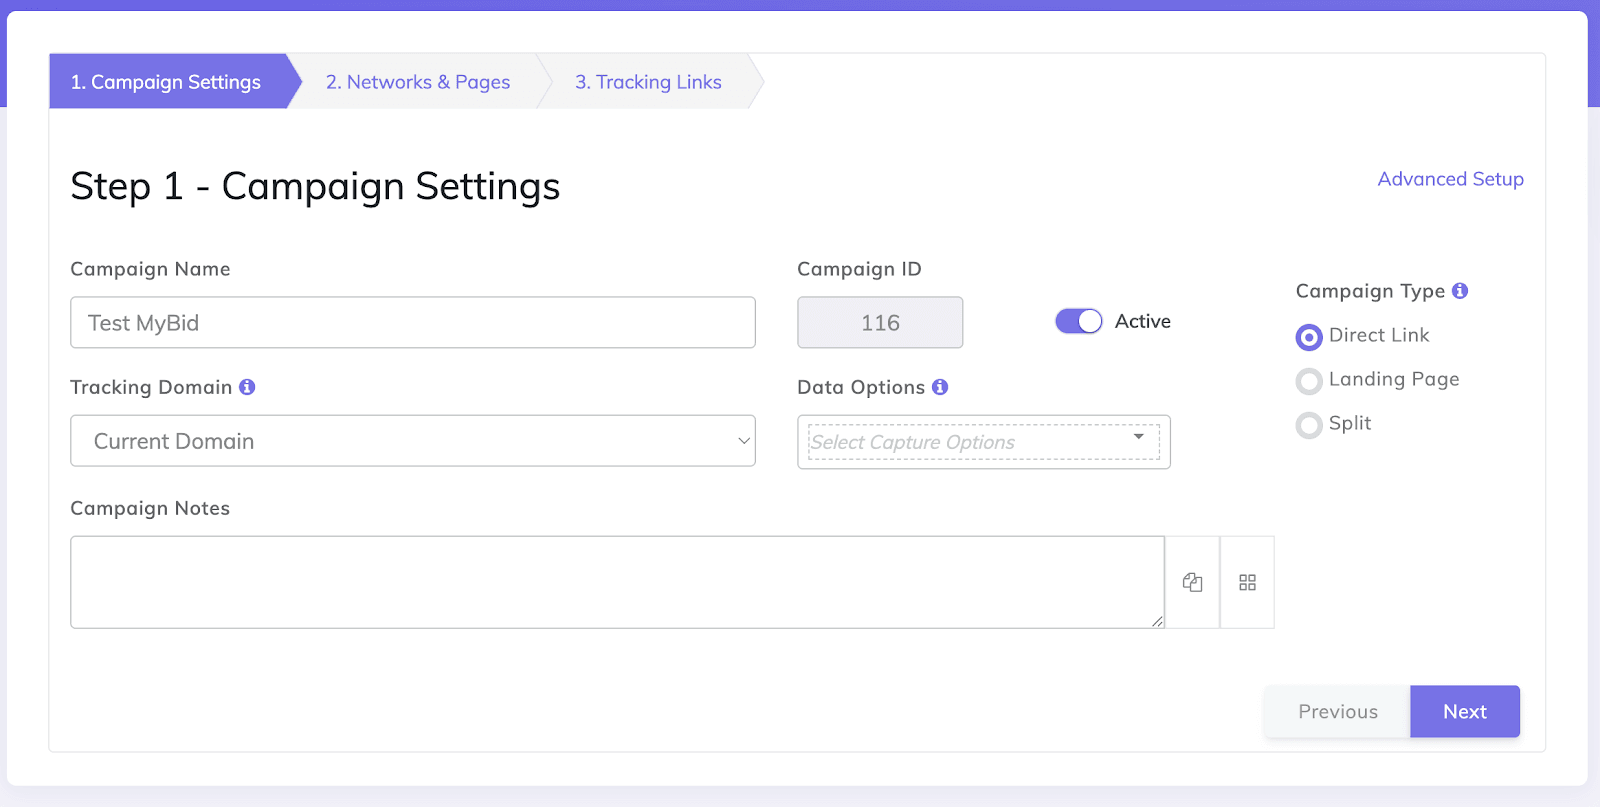
On the next screen:
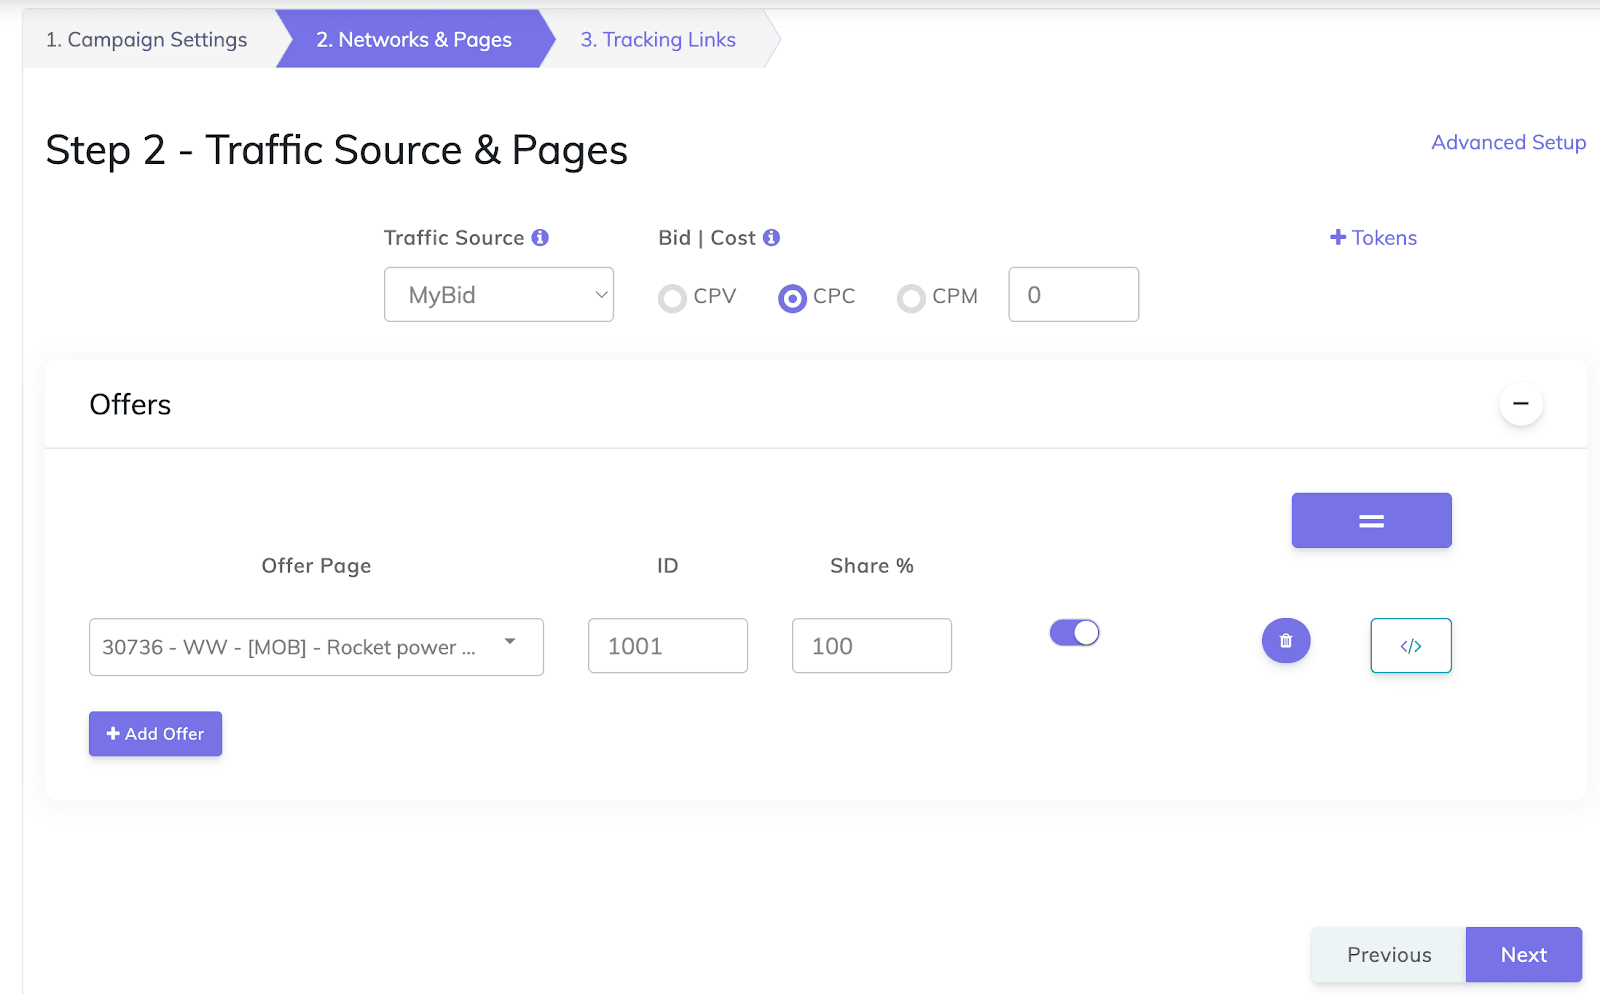
1. Choose MyBid as the Traffic Source
2. Select the desired offer
3. Click Next
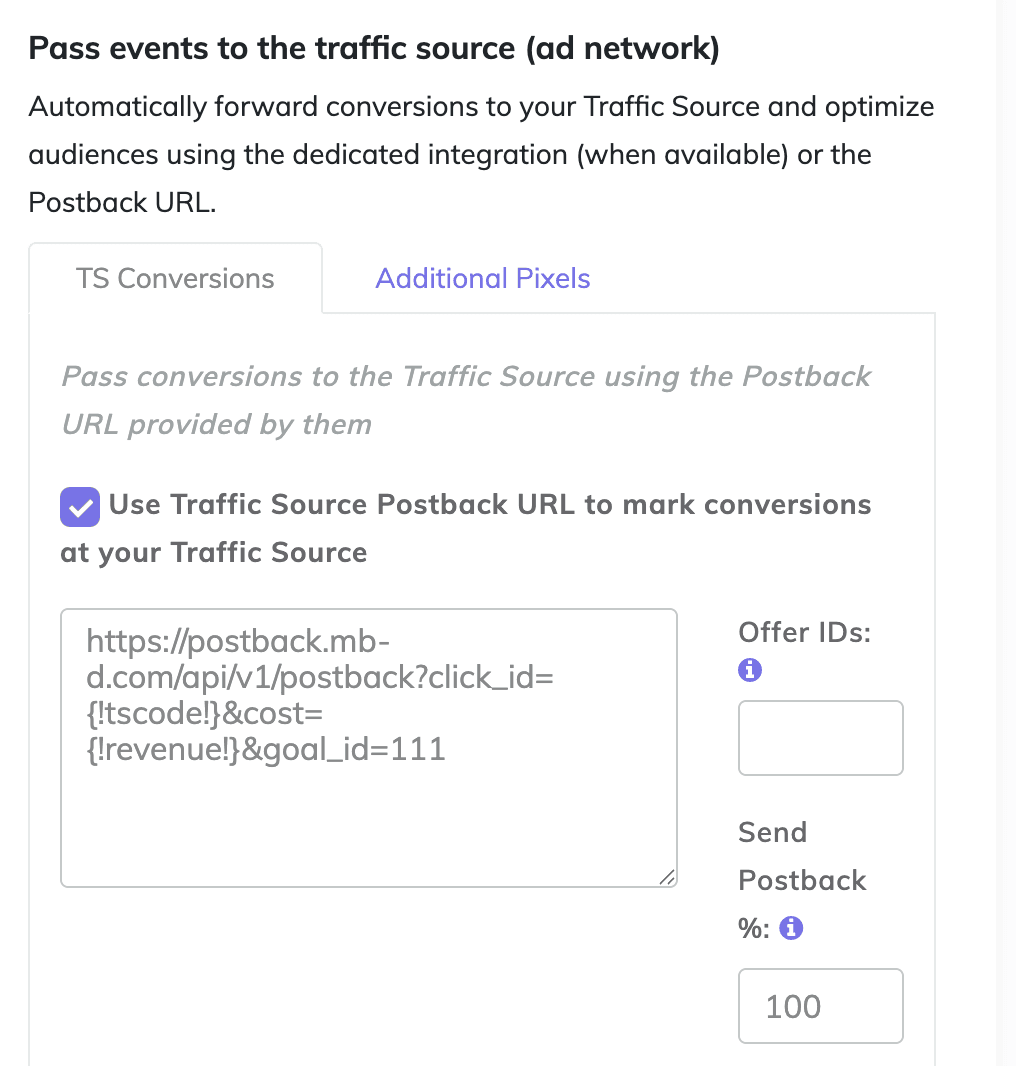
In the “Tracking Links & Conversions Postbacks” step, check the option “Use Traffic Source Postback URL to mark conversions at your Traffic Source” and then click “Save Campaign”.
Copy the generated Campaign URL. This URL will be used when setting up your campaign in MyBid.
Copy the Campaign URL
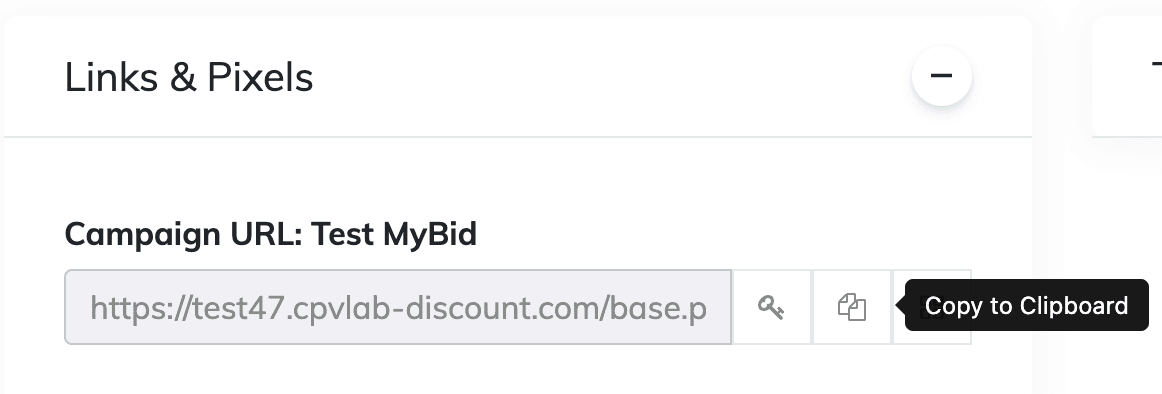 Now you can set up your campaign in MyBid!
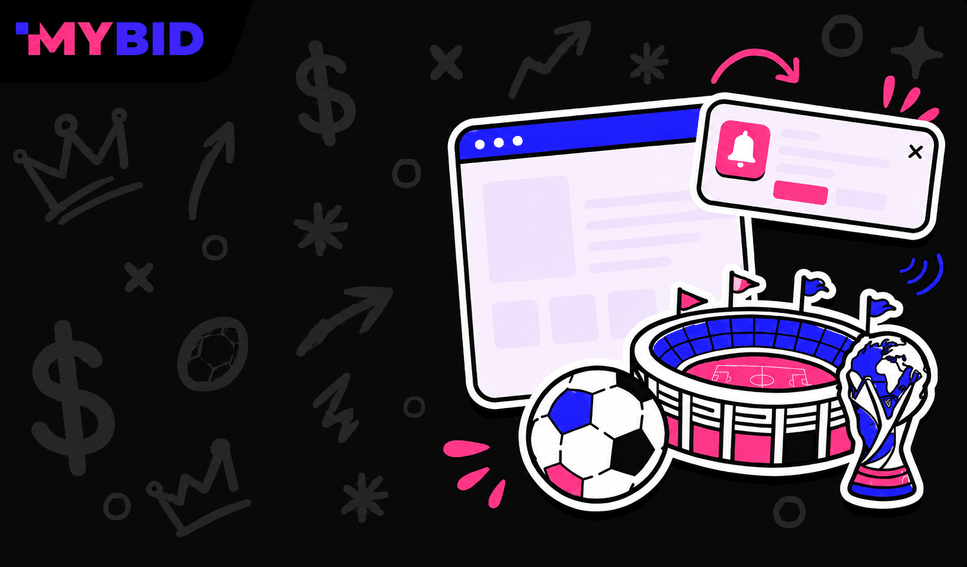
Step #5: Launch the Campaign in MyBid
Log in to your MyBid advertiser account and create a new campaign. When setting it up, make sure to use the Campaign URL you copied from CPV Lab as your Ad URL.
How can conversion tracking help users?
Understanding what is conversion tracking and applying it effectively is critical for performance marketers. The benefits of conversion tracking include accurate ROI measurement, campaign optimization, and smarter budget allocation. With online conversion tracking, advertisers can see which ads, creatives, and keywords drive the most valuable actions.
For example, keyword conversion tracking helps identify profitable search terms, while broader conversion tracking shows overall campaign performance across multiple channels.
This directly answers the question how can conversion tracking help users?
1. It provides transparency into ad spend and outcomes.
2. It highlights the most effective creatives and placements.
3. It enables smarter scaling of profitable campaigns.
4. It reduces wasted spend by identifying underperforming traffic sources.
5. It empowers data‑driven decisions, ensuring every dollar invested is accountable.
In practice, conversion tracking transforms guesswork into measurable strategy, helping marketers maximize ROI and fully understand how to track ROI from social media ad campaigns or any other traffic source.